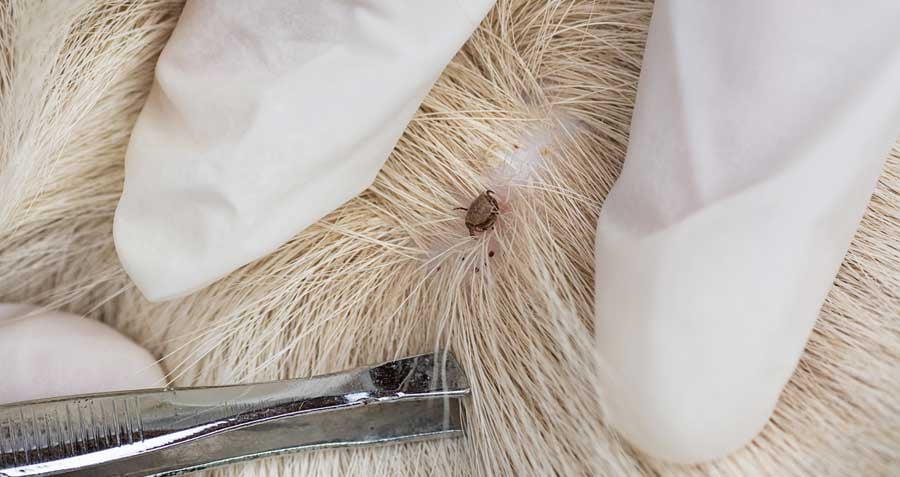
If you searched "animal hospital near me" because you found a tick on your furry friend, then look no farther--we've got the answers you need. There are few things quite as unsettling as seeing a tick buried deep in your pet's fur; it's enough to drive a shudder down the strongest spine. Ticks are unpleasant, disease-ridden little creatures, and, although most of us don't much like the idea of removing a tick with our bare hands (or even with tweezers, for that matter), it's something that has to be done to take care of our pets. For that reason, our animal hospital experts have compiled some information on removing ticks.
A Quick Review
When it comes to tick removal, there are some tips that actually come before the fact, and, although they might not be helpful once a tick is already embedded, you're likely to want to put these suggestions in play just to avoid ever having to touch a tick again.
The first step is to use tick prevention medication. There are plenty of options out there for all of your furry friends, and a vet can help you decide what's best for your pet depending on age, health, and your location. What's important is that you always use tick medication. Not only does it help prevent the spread of diseases, it makes removal easier for any tick brave enough to bite your pet anyway! Remember, ticks are a year-round challenge for your pet, so even when the weather starts to turn cold, keep using that tick medicine.
Next, it's important to know that you can remove a tick at home. Many people will rush a pet to the doctor to have a tick taken off, but the truth is that it's not only possible to remove a tick yourself--it's also better. In this case, speed outweighs skill, so even if you don't think you're qualified, you're the first responder and the best person to remove the tick. Although it's true that leaving "tick parts" behind can cause a skin infection, these are easy to catch and easier to fix, and they certainly aren't as big an issue as the various problems caused by a long-term tick passenger on your pet.
Okay, now you've done your homework. It's time to take the test: real-world tick removal.
Step-by-Step
Now that you have all the necessary background information, you can learn how to properly remove a tick from your pet. Our pet care experts have been removing ticks for years, and they know just how to do it--so here's a step-by-step crash-course in tick removal, straight from the pros.
- Step 1. Begin by gathering the necessary tools. Luckily, this part isn't too complicated. All you need is a set of tweezers or, if you're feeling brave, some strong fingernails. It's not necessary to use pre-extraction solutions, because, as you'll see, the removal process is actually pretty easy.
- Step 2. Next, it's time to get down to business. Ticks enter the skin by burying their heads, so you'll want to pinch just at the base of the head. Get the tweezers (or your fingers) as close to the skin as possible. With that, all you need to do is pull, and you will have successfully removed a tick. Mark that one off the bucket list!
- Step 3. Although you may have won the battle, it's important to make sure you've also won the war. Keep an eye on the site of the bite, looking for any redness or inflammation. This could suggest that you didn't quite get all the tick parts out of your pet's skin--and that calls for a trip to the animal hospital. Don't worry, though. Getting the tick off quickly and leaving some "tick bits" under the skin is still better than leaving the tick on your pet long-term, because a skin infection is easy to handle, while a disease transmitted from a tick can be a huge problem.
Interested in more tips for pet care? Searching "animal hospital near me" hoping to find quality pet healthcare nearby? Contact us today!
